A few weeks ago, our family welcomed a beautiful new addition, a baby boy named Sawyer. We haven’t had a baby in our extended family for over 8 years, since my nephew was born, so everyone has been so overjoyed.
Luckily, we got to meet this special little man yesterday. While I’ve seen my fair share of babis, I think he’s definitely one of the cutest.
Since I didn’t want to show up to our first meeting empty handed, I thought I would make Sawyer his first (of many to come I’m sure) homemade presents from his second cousins, Mr. and Ms. A.
DIY Embroidered Onesie
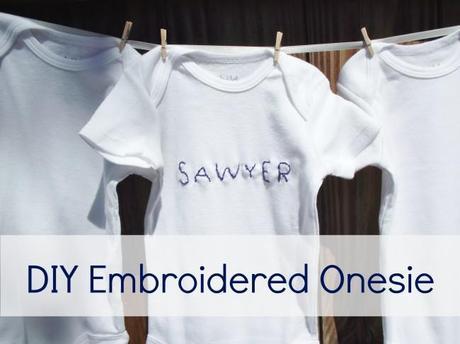
Materials:
- Appropriately sized onesie (any color of your choice)
- Scissors
- Embroidery thread (any color of your choice)
- Needle
- Pencil
- Appropriately sized print out of name or phrase you want to embroider
- Ruler
Method:
First you want to figure out where you would like to place the phrase or name you are embroidering onto the onesie. Once you found a spot, measure the width of the onesie.
Keeping the width measurement in mind, create your name or phrase in a word processing program of our choice. I would suggest using simple fonts. It will be much, much easier to transfer and embroider.
Once you have your design, print it out and cut it down to a manageable size.
Now wash, dry, and iron your onesie.
When the onesie is all fresh and clean, place your printed phrase on the inside of the onesie in the desired location.
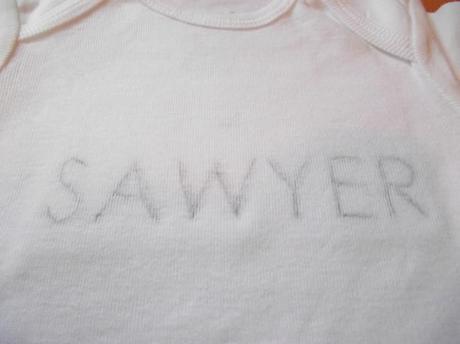
Once you have it in the right spot, gently trace the letters over with your pencil.
Now, you are ready to sew. Get your needle ready by threading the embroidery thread through the eye one time and tying off at the end.
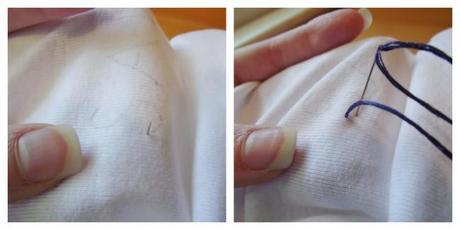
Start at the bottom of your first letter and do a ¼ inch forward stitch.
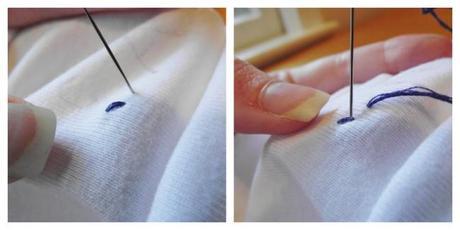
Now, while the thread is on the underside of the onesie, take the needle up about a ¼ of inch and match it up with the outline of your letter. Pull the needle and thread through the top. And then place the needle through the same spot where you ended your previous stitch. Aka perform a back stitch.
Continue your back stitching until you reach the end of the letter. Tie off your thread and cut.
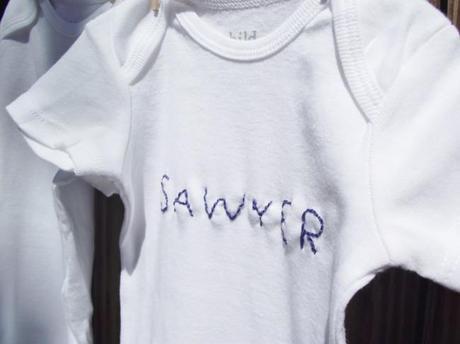
Then repeat the same steps for the rest of your letters until you are done.
If you have especially curly letters like “S” or “O”, you will want to make your stitches a little bit smaller so that you can properly match the curves.
If you mess up one of your stitches, no worries, take your needle off the thread and then use the needle to remove the stitch you just made.
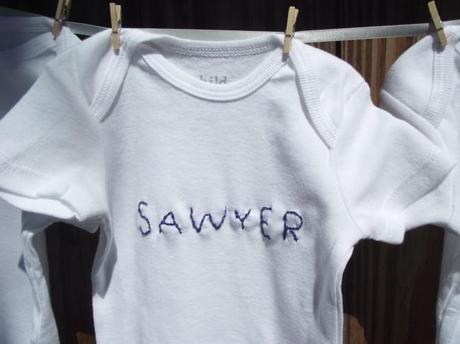
This is a really simple craft but a great way to make a personalized gift.
And you can even help your newest addition learn how to spell 
Welcome to the world baby Sawyer.
So glad to have you as family.
