Today, I’m going to show you make a purse or bag without sewing, cutting, gluing, taping, or stapling. This is the ultimate, minimalistic-travelers bag because it folds flat and can be re-used in different ways over and over again. It is also an inexpensive way to update a wardrobe, or to use extra lovely cloth, or to wrap presents (even wine bottles) safely and securely.
In Japan, they use a special cloth for this called Furoshiki. I just use pretty square scarves.

Kamal’s a nice guy. Stop by and say hey.
. . . . . . . . . . . . . . . . . .
I picked up the scarf used in this tutorial at one of my favorite places to shop in Orange County– What Goes Around Clothing. It’s a “thrift” store– focusing on brand-new and previously-loved name brand clothes and vintage finds. The owner, Kamal, is welcoming and positive and the store is filled with unique trinkets including Star Wars posters, tiny knights, records, and lamps made from bottles. All those things aside, though, I love the store because everything in there feels hand-picked for awesomeness. If you happen to be a local, stop by and say hey, and check it out.
What Goes Around Clothing
2750 Harbor Blvd, Suite a-6,
Costa Mesa, CA 92626
. . . . . . . . . . . . . . . . . .
1. Start with a square piece of cloth.
I prefer my bags large enough to carry several books, so I make sure that the scarves I use are at least 30″ X 30″. I also carry heavier things in my purses, specifically books– so I prefer tightly woven fabrics that are harder to rip.
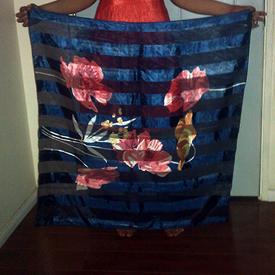
I picked a shiny, slightly transparent one! Ooh, pretty.
2. Fold in half, triangle-way.
If your square piece of cloth happens to have a design on one side and not the other, be sure to fold it so that the not-designed part is face up, and the design part is in the sandwich.
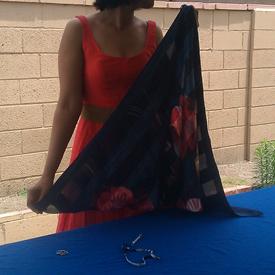
If you’re using a big cloth, like mine, it’s good to have a big enough place to lie it down once it’s triangle folded.
3. Knot off each triangle leg.
Make it so each knot is equidistant as possible from the original edge.
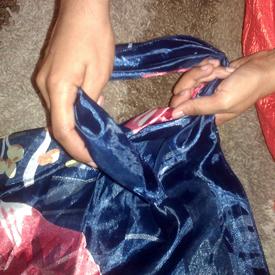
Just a normal knot will do. The only important thing here is to try to make both sides equal-ish in length.
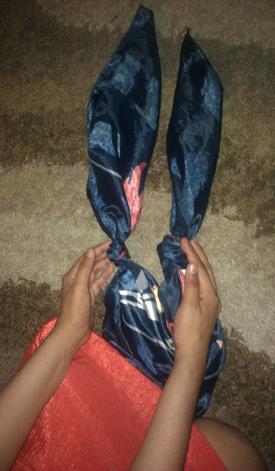
It’s nice to use fabric that is easy to adjust in case you’re a perfectionist like me. The longer the fabric after the knot, the smaller the purse.
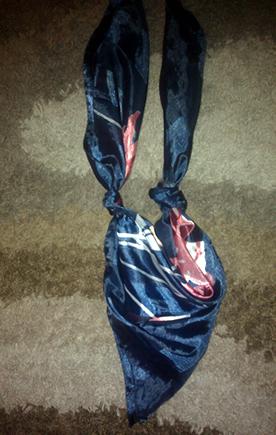
It should look something like this.
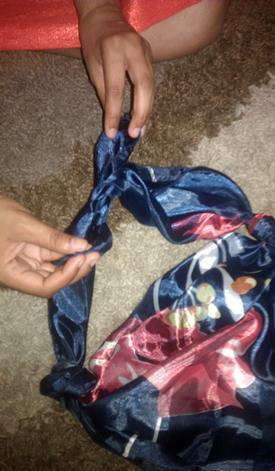
If you’re going to carry heavy things, knot the legs together. The knotted edges are the base of your purse, so it adds a little strength.
4. Turn your triangle-sandwich inside out, with the knotted edges on the inside.
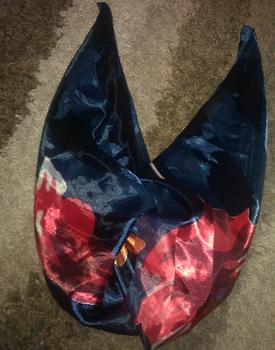
You should now see the shape of a bag/purse.
5. Decide on your handle.
The nicest thing about this purse is that there are no real permanent decisions. You can always go back and re-knot something. There are some basic handle differences, and I’ll give them entirely fictional names here, just to distinguish and because I like naming things.
The Artful Dodger
For travelers, those walking unknown paths, and those carrying important goods.
(Personally, visually, this is my least favorite of the folds, but it’s also the most useful. It ends up opening up very easily to you if you know how to get in,– but to everyone else, the purse is basically on lockdown. Click the pictures for instructions.)
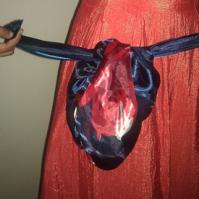 Take the two sides of the purse that you have, and make a basic knot that pulls the purse into a ball shape.
 You’ll still have handles, so tie those together at the top, giving yourself a sort of circular purse.
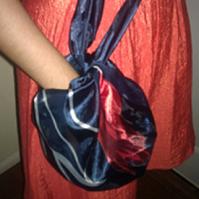 See? You can reach your hand in, but nothing else really can without extreme effort. Take that, pick pocketers!
The Samwise Gardner
For lovers of food, shoppers of farms, and collectors of precious wildflowers.
(Personally, visually, I love this fold, but I just can’t seem to rock it. It’s light, and bohemian, and tucks right under your arm. Click the pictures for instructions.)
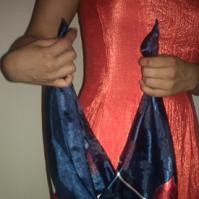 Take the two sides of your purse base, and tie just the tip tops together.
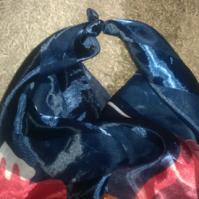 Like this.
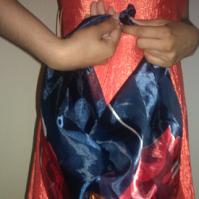 It’s ready to wear! Perfect for a day at the farmer’s market.
The Jo March
For readers and writers; for those with bohemian hearts and city lives .
(Personally, visually, this is my purse. When it’s a tight fold, it’s professional enough to take to work and I can adjust the handle to match my outfits. There’s less on-the-fly versatility with this fold, but it’s easier to tweak into a fashion accessory. Click the pictures for instructions.)
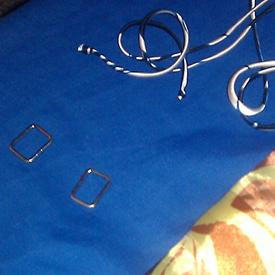 You need supplies for this one. I used the metal brackets from a purse that broke, and the straps from a camisole that I also destroyed.
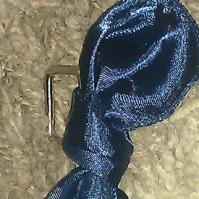 Take the two sides of your purse base, one at a time, and tie it around the metal purse bracket. Tightly. Each side should look like this.
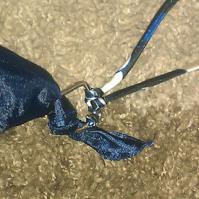 Tie one side of your rope or handle to one side of the purse… and the other side of your rope or handle to the other side of the purse. Both sides should look like this.
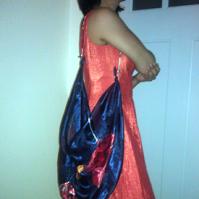 This is the final version of the Jo March, at it’s largest. I usually prefer one about half this size for work, and exactly this size for days off.
And that’s that! There’s a million other folds available. In other words, a square piece of cloth should always be in your arsenal!
Other notes:
- I thought this was perfectly timed for the Daily Post’s opposite day, since I’m not much of a DIY blogger. Partially because my photos are so bad and partially because I often miss steps. Luckily, I’m quite good at answering questions, so if I confused you on a step, just let me know.
- I’m not a fashion blogger either! I’m sure a lot of you could turn these bag folds into something doubly fabulous. Unfortunately, my ability to help you ends at the functional… so if you would like design ideas, or other thoughts on upcycling various items, please turn to some of my favorite “turn this into this” fashion bloggers– Lindy over at Changing Your Clothes, and The Remissionary.
- Maybe it’s time to add a permanent site disclaimer to this regard, but I can’t be bribed or cajoled into writing something nice about someone. What Goes Around got a spotlight because the place rocked my world, simple as that.
- Also, these styles of bags are for men, too. Even Mick Jagger carries one.
______________________________________________________
So, did you recognize all the characters that I named the bags after? Are you a furoshiki expert already? Do you like my shiny dress?
 Take the two sides of your purse base, and tie just the tip tops together.
 Like this.
 It’s ready to wear! Perfect for a day at the farmer’s market.

