Well, the good news is, boys and girls, that week has finally arrived; I have completed it and here it is. Well, to be honest with you, I completed it a while ago; on the day I drew the cartoon to be absolutely accurate; but its taken me until now to find it---due to the fact that there's an awful lot of work on my hard drive and I can never remember what I name these damned things and so generally loose them to the ether within seconds of saving them. So in the grand tradition of all things of this nature, I found it yesterday while looking for something completely different...which, for the record, I didn't find.
Anyhoo, that's enough about me and my lackadaisical attitude to tidiness and tardiness. Lets get onto it shall we; lets get onto the second post, the one in which I show you my process in colouring an editorial cartoon in Photoshop.
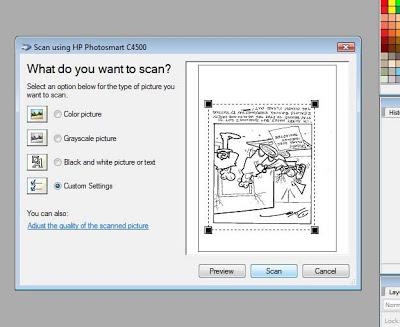
1: First off I scan the cartoon into Photoshop, selecting Black and white and 300 dpi as its resolution. Once I've previewed it I use the marque tool (the bounding box of broken lines that surrounds it), then I click scan.
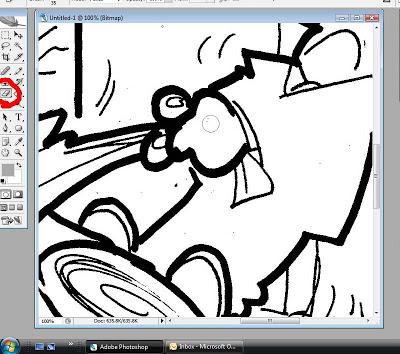
2: Once the cartoon appears, I select the eraser tool (see highlighted) and start removing all the black dots and imperfections; making very sure that I don't rub out anything important to the finished cartoon.
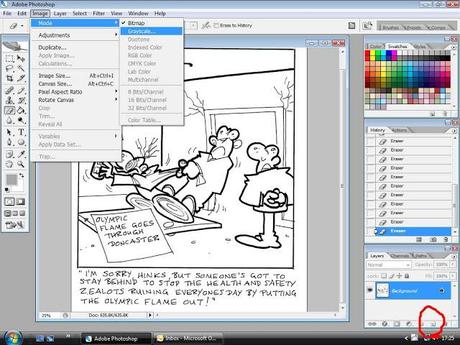
 3: Once the cartoon has been cleaned up its time to create layers. So first off I go to images+mode+greyscale. Then go through the same process again images+mode but this time select CMYK. (if the cartoon is purely for the net you can chose RGB---more about that later).
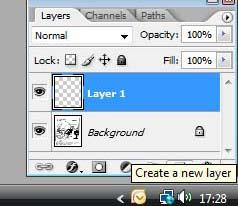
 Once you've completed that click on the 'new layer' tab (highlighted) and in the box that says 'Normal' change it to Multiply.
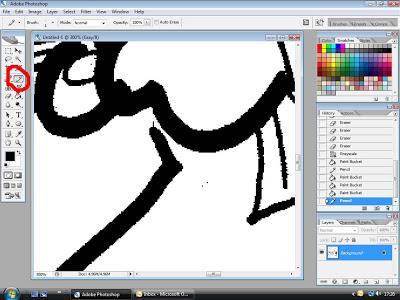
4: Next choose the'pencil' tool, select '1' as the ratio, and connect the broken lines. I do this because when I apply the 'paint bucket' tool, and if there are any gaps, the color will flood out all over your mini masterpiece.
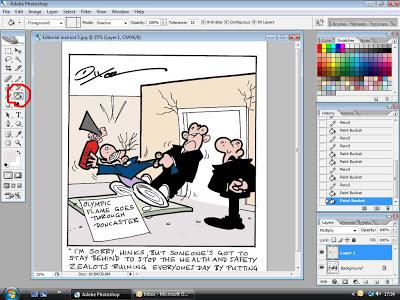
6: Now start filling in the picture with colours of your choice.
If you only want solid colours then your picture will soon be complete, but if, like me, you like to give your images a little more substance, then in the next part we see how I personally build up the color layers with just a mouse and no tablet
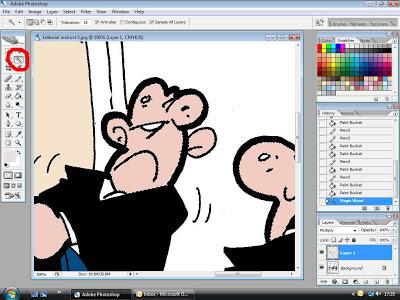
7: First off select the color you want to shade. In this case I chose the flesh tint. Once you've clicked on it with the 'magic wand tool' then un-tick the 'contiguous' box on the bar above. This will ensure that Photoshop now only recognises the areas that have flesh color in it (or what ever color you chose); in other words, if you accidentally went over the edge of the flesh area, the pen or air-brush tool wouldn't make a mess of any neighbouring colours.
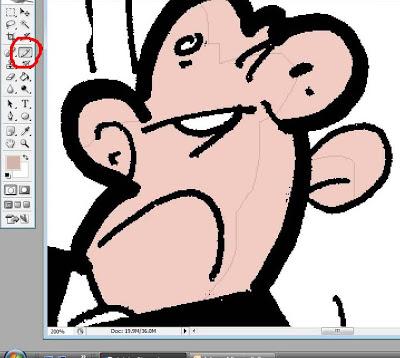 7: If you don't want the dotted lines running around the perimeters of your selected colour, select Ctrl+H and they will stay hidden.
Now chose which direction the light is coming from and with the 'Pencil Tool' define the delineation lines. Once that's done to all the areas of the color you've selected, hit the shaded side of the lines with the 'Paint-Bucket' tool.
Once completed you must press Ctrl+D to make sure the 'Magic-Wand' tool has been deselected before moving onto your next color.
Follow this process on until your cartoon is complete.
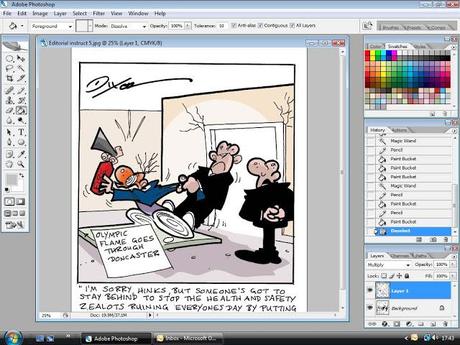
8: And that is pretty much it. The cartoon has been coloured, save it as a JPeg for the newspapers or what ever format is required, and name it. (that's when things normally go pear shaped and I lose the whole file)
On another note. If you wish to put your work up on the net and you upload it in CMYK, all the colours will look garish and horrible. So to avoid this happening you will have to re-save it as an RGB. That way when you put your masterpiece up on your Facebook or Twitter or any other social media site you have, it will look to others the way you intended it to look.
To make this happen, simply retrieve your CMYK cartoon from your documents then go to: Image+Mode+RGB---once this is done re-save the cartoon. I normally do it by simply adding 'RGB' to the end of whatever it was originally called. And that's it. Your cartoon is now saved for print and the web.
Phew, well there you have it; how I paint a cartoon in Photoshop. If I have the time, the inclination or I can be bothered, I'll be doing a few more of these to show you how more complicated work is rendered.
Until then; happy double clicking and I'll see you all soon.
Cheers
Karl
By the way, if you are in need of books, DVD's, games, electrical goods and you're going to use Amazon to buy them, please click onto it through my site on the banner advert to your right; for every person that does I get a payment from Amazon, and if you order from that click then I get a commission on what you buy. It doesn't cost you a single penny extra but it does help fund this blog, enabling me to carry on giving you free cartoon advice and stories.Please remember, every click you make helps me entertain you! Thank you
