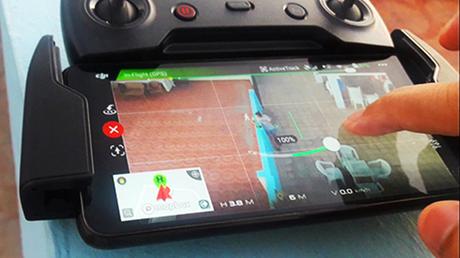
cool and easy drone tricks
A little reminder, some of these drone actions may or may not be available depending on your installed drone app. And, make sure that your drone's status is all working properly when flying. As per experience, conditions like compass recalibration, presence of any magnetic field, and/or having a weak GPS signal (they are just a few examples) can prevent you from doing some of these actions properly. But don't worry, simple trouble-shooting usually solves them by following the given instructions when they occur - unless you need to change location.
There are many intelligent flight modes available but I will just share with you some of my favorites. To use them, easily follow the steps below:
Step 1: Press the "change mode" button on your mobile screen while using the drone app (DJI GO 4)
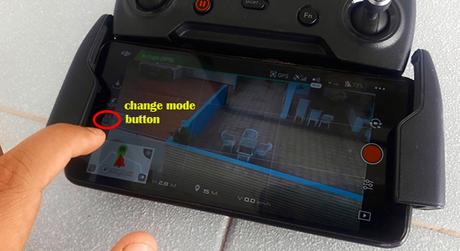
change mode button
Step 2: Select the "QuickShot" menu
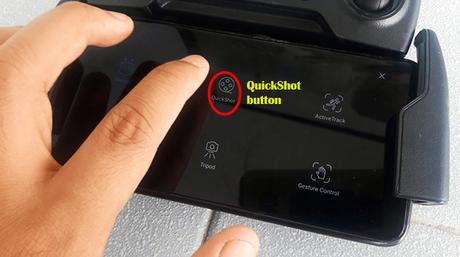
quickshot menu
Step 3: Select your focus by touching the screen
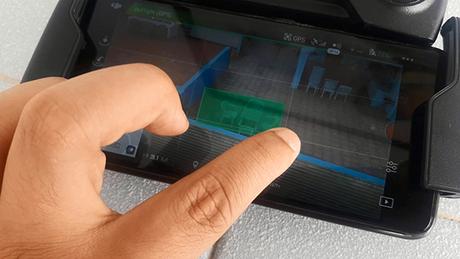
select your focus
Step 4: Then select your desired intelligent flight mode
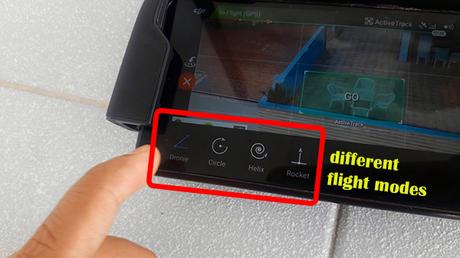
intelligent flight modes
Let's start with the most basic which is ROCKET.
The drone will move on top of the focused subject, move its gimbal (camera view) downwards then shoots itself upward just like a rocket hence the name.
You can also easily do this on manual mode just be positioning the drone on top of the subject, moving its gimbal down, then lifting the drone up by pushing the left joystick forward.
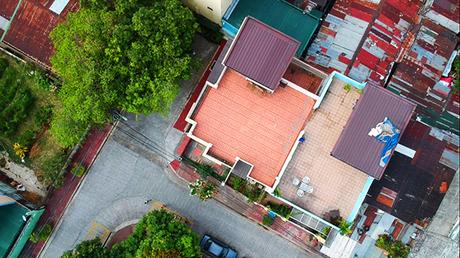
rocket flight mode view
Next is the DRONIE
Once the focus is done, it will move backward and upwards at the same time giving a cinematic view of the subject.
You can actually do this on manual mode by combining the lift and the backward movement of the drone but the tricky part here is the gimbal focus. Selecting ANY intelligent flight mode lets you produce smooth footages making it a priority when able. And another reminder, make sure that the drone's path is clear when it performs its flight.

dronie flight mode view
CIRCLE or HELIX
These are both different flight modes though quite similar to each other. They both circle-around the focused subject but the CIRCLE maintains its height while the HELIX slowly gains altitude and goes further as well.
It can really be hard to do super smooth footages for these two flight modes when the wind condition is not that good. But when you pull one-off, it can really produce a dramatic scene.
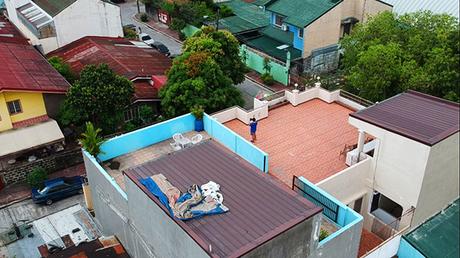
circle or helix flight mode view
Now, for the ACTIVE TRACK feature
Simply select the active track menu after the change mode button is clicked (the same screen with the QuickShot menu on step 2 above),
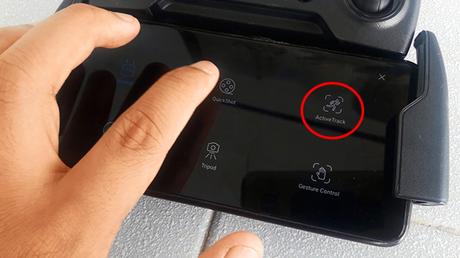
active track menu
When this mode is chosen and after selecting your focus, this will enable the drone to follow the subject accordingly.
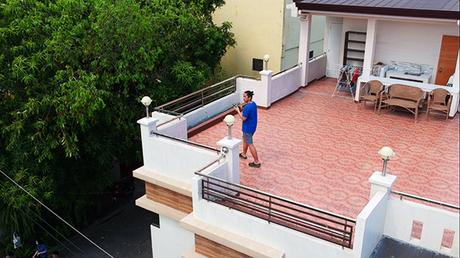
active track flight mode view
You can even follow the subject while the drone is circling around it which is SUPER COOL to see. You can do that by simply swiping your screen following the given arrow while on active track mode.
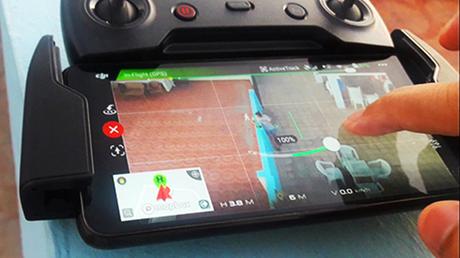
circling active track
Helpful tips:
* Maintain your gimbal speed to a single digit value - Cinematic footages are more dramatic when the gimbal speed is slow. Though it may vary on your target video output. But most of the time, slower is better.
* Set your customizable buttons in the remote control to gimbal up/down - In reference to the tip above, time is gold when the drone unit is turned on. It will take time for you to move your gimbal if its slow so make sure to take advantage of this feature to adjust it in one click.
Reminder:
* Try to be in video recording mode as much as possible - When changing modes, regular video recording stops. When doing QuickShots, it automatically video records it but then you have to click the record button again especially when you switch back to manual or other modes. So make sure to always double-check your screen if it is recording.. It is always easier to edit than to do it all over again.
* Videos in cache - If you check your videos in your cache memory, it is normal that you'll see your videos there compressed to about like 10 secs. Yes, it usually fast-forwards its middle part to achieve its target. Again, don't worry because it is all recorded well (at ordinary speed) in your memory card installed in the drone (if you did lol).The video quality is also affected here if you get them from the cache memory but just the same, you'll get the best quality once you access your memory card video recordings.
* Practice is key - It will be tricky especially on the start, but it will not be that long for you to handle it well after some practices. Yes, practice is key but being creative here can bring you further.
Here is the video version of this post for better guidance especially for the ones who understand better when they actually see it. Let's see if I can still do another blog/vlog for more learnings but until then, enjoy your drone.
If you cannot see the video above, click HERE for it


