DIY Blackboard in 3 Easy Steps
What you will need
-

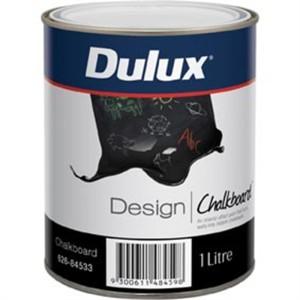
Blackboard/chalkboard paint from Dulux
Paint to paint the wall any color to fix it before you apply the blackboard paint
- Plaster to fix any holes or uneven surfaces
- Sandpaper to make sure all smooth if you have plastered
- Chalkboard paint
- Plastic sheets to ensure you have paint everywhere
- Painters tape (you will be thankful you got it, trust me!)
- Paint brushes
- Chalk to use on the chalk board
- Kids who are keen to be artists and try out their new blackboard! I am sure you will be able to find this easily.
Step 1 – Prepare your wall
Make sure your surface is smooth and clean. My wall had to be patch up, as it had some uneven parts. Once we re-plastered those, dried them and sanded them back the wall was painted all over with a white color. The white color got two coats and had to dry to make sure it was ready for the blackboard paint.

Wall plastered and sanded. Now ready for the cream paint.

Painting the wall white, before you add the blackboard paint.
Step 2 – Add the blackboard paint
Once all the wall is dry from the other paint you are now ready to add the blackboard paint. Make sure to place painters tape to mark the area where you would like to have the blackboard. This tape is a wonderful thing, it allows you to have great shapes that are neat and great lines and the tape just comes off after the paint is dry. It also helps you not go outside the lines. You don’t want to have black paint on the lovely white wall area. We did two layers for the blackboard paint and let it dry for a few days before we used it. Make sure to read the instructions on the tin.

Adding the blackboard paint

The blackboard is ready. Looking good! Can we use it now mummy?
Step 3 – Test out your new blackboard. Have fun!

Julia very pleased with her new blackboard.
The girls are getting so good at writing and the first thing they both wanted to do was to write their names. As a proud mommy I had to take pictures of how clever they were, and also due to the blackboard being a new addition to our house.

The art did not just remain with names or cute pictures it did get very wild and abstract. I was pleased and glad that the kids had fun. I like the idea that the blackboard is a place for the twins to express themselves and be creative.

Happy drawing away.

The first art that graced the new blackboard, aside from the girls names.

The creative art from the artists, Julia and Lillian.
Have you created a blackboard for the kids or yourself? Where did you put it? We made ours on the back wall of the house. This area is under cover and allows the kids to use the blackboard even if it is raining.
Now you see you can have a blackboard in 3 easy steps, why not give it a go! It is a great weekend project. Enjoy and have fun.
 Share on Facebook


