 Today I am super excited to have the opportunity to take over Kaitlyn's blog and share with you all a little tutorial that I hope will help advance your blog and generate additional traffic. I actually found this similar tutorial via the help of my dear friend Ashley @ Wannabe Green.
I recently started working with BlogHer Influencer. As part of the requirements, I get to advertise items on Pinterest via my blog. So, during the registering process my blog had to be verified through Pinterest and my Pinterest account had to match my blog.
If you spend a lot of time on social media sites or blogging, BlogHer Influencer is an awesome opportunity to get involved with in your spare time. Also, if you link many of your blog images to Pinterest, do you know if your blog is currently verified?
Have you noticed you can now verify your website on Pinterest?
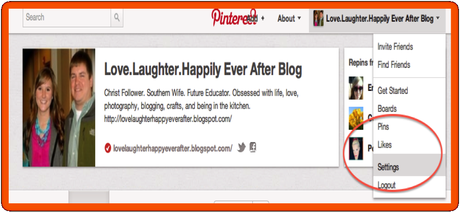
Verifying your website on Pinterest is a good for bloggers. Once verified, Pinterest will prominently display the blog web address, which should help bloggers engage with others and "brand" their page. Also, verifying a blogger Pinterest account can increase credibility and traffic.
The verification feature via Pinterest HTML Meta Tag has been available for a few months now, but bloggers with the Blogger platform have not been able verify their website due to uploading errors within servers. It is a fairly simple process, and I will walk you through with a few screen shots.
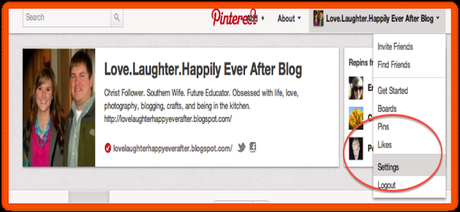
1) Log in to your Pinterest account and go to “Settings”
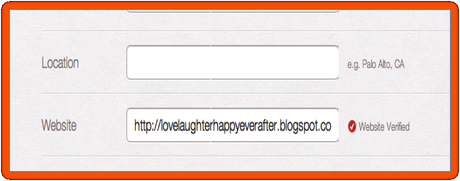
2) Scroll down to “Verify Website” and click the button. (Currently, my website is already verified. You will see a different message that will say “Verfy Website” if it is not verified.)
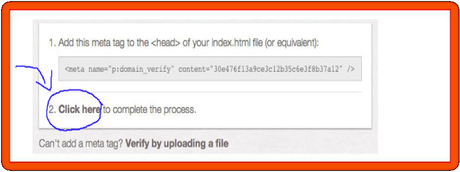
 3) On the next page you will have the option to download an HTML file or to verify with an HTML Meta Tag. Click the option to verify with a Meta Tag. You will see the following:
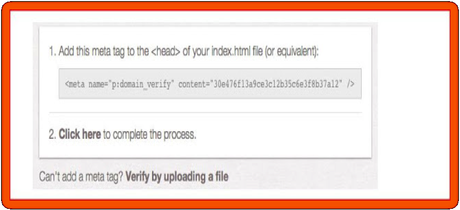 *Select and copy your Meta Tag. (It is the code in the gray box.)
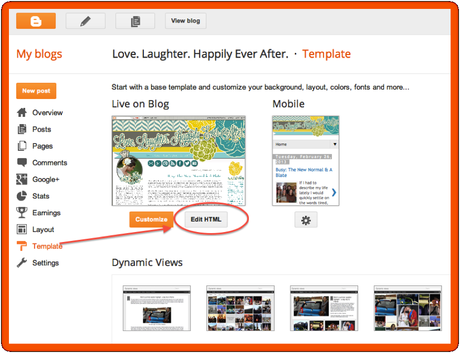
4) Log in to blogger and go to "Template" and select “Edit HTML”
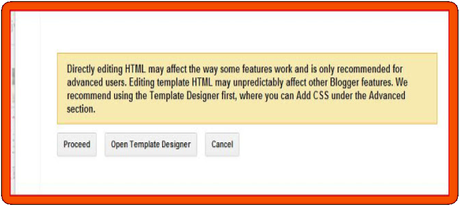
 You will see a warning message, click proceed.
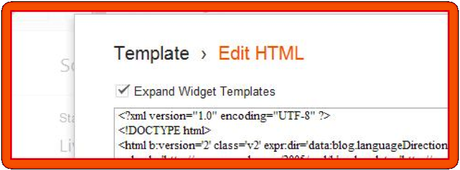
 5) Click the button to expand widget templates.
 6) Hit CNRL F and search for the word "head". You should find 2. The opening head tag: “<head>” and the closing head tag: “</head>”. Your Pinterest generated code needs to go somewhere in between these 2 tags
7) Paste the Meta Tag info somewhere above the closing /HEAD tag </head> but below the opening <head> tag
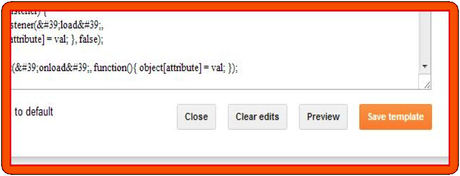
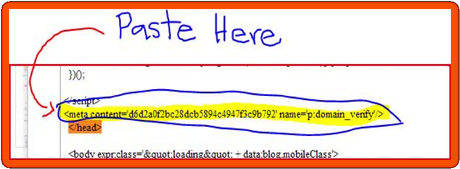 8) Test your changes to make sure you did not mess up your blog. To do this, click preview and make sure it loads properly. Then click save template.
 9) Head back over to Pinterest and click the click here button for Pinterest to verify your site.
 10) That is it, if it worked, you are verified! Head back to your main page to check it out!

I hope you all have a wonderful day, friends! You can find me over at Love.Laughter.Happily Ever After. I would love to "meet" you and tour your little dot come world!
As always, until next time- Happy Blogging!


