 Well hello everyone. Sorry for the radio silence this week. Planet Baby's affairs of state have been keeping me occupied. We've had our gate and fence fixed after those crazy winds. Once the car is repaired, the total cost of the damage caused in that split second will be about $4,000! Madness. Thank goodness for insurance ☺. Anyway, it's time for another 'Blogging 101' post.
So far, we've looked at:
- linking your email address to your Blogger profile;
- choosing your profile photo/avatar;
- adding your 'About me' widget; and
- adding 'Home' and 'About me' pages.
What next? Let's make it easy for them to follow your blog!
Subscribing using Google Friend Connect (GFC)
When I started blogging in July 2010, GFC was a great way to follow blogs and could be customised to make it much more personal. Unfortunately, this option now only works on Blogger blogs and only in a basic form.
To add the GFC widget:
- Go to your blog homepage and click on 'Design' and 'Layout'. This is what mine looks like.
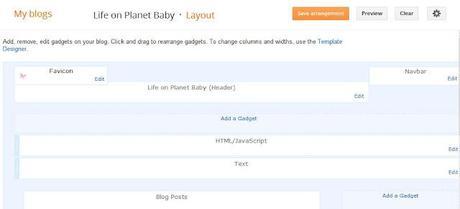
- See the 'Add a gadget' box on the right-hand side? Click on it.
- The Blogger 'Add a gadget' box will then pop up. Scroll down to 'Followers' and click on it.
- You can change the title from 'Followers' to something more personal if you wish.
- Click 'Save' and then drag and drop it to where you want it in your sidebar. Having it somewhere near the top is a good idea.
- Click 'Save arrangement' and you're done!
Some options used by bloggers with non-Blogger blogs are:
- Bloglovin';
- Networked Blogs; and
- Hello Cotton.
Subscribing in a reader

- Go to your blog home page and click on 'Design', 'Layout' and then 'Add a gadget'.
- Click on 'Subscription links'. You could change the title from 'Subscribe to' to 'Follow me' or something like that. Hit 'Save'.
- Once you're back to the 'Design' page, just drag and drop the box to where you want it. Click on 'Save arrangement'.
gi The most common one used is Google Reader but there are heaps of others.
Making your feed user-friendly To make your feed user-friendly (ie with all the options for the different readers so everyone's choice is covered):
- If you haven't already, type your full blog name (ie http://www.yourblognamegoeshere.com/) into the box under 'Burn a feed right this instant'.
- Click 'Next'.
- A box will then open up with 'Atom' and 'RSS' options. I usually choose the 'RSS' option. Click 'Next'.
- Click 'Next' again. Then you'll see this.
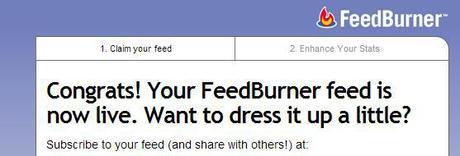
- Click 'Next'. And 'Next' again.
- Then click 'Optimize' and 'Smart Feed' on the left.
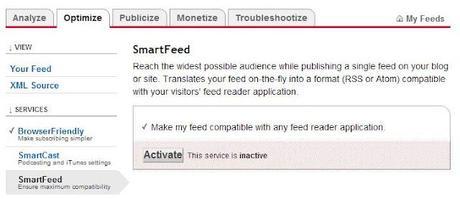
- Click on 'Activate' and then you're done! Now when people click on that widget, it will open up with a variety of reader options for them to choose from.
- Click on your blog name;
- Click on 'Publicize';
- Click on 'Email subscriptions' on the left;
- The first option is to have a box in your sidebar where people can enter their email address.
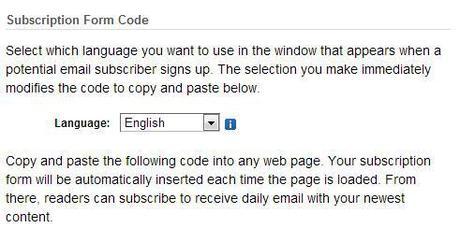
- Click on 'Use as a widget in' and select your type of blog. Click on 'Go'. The widget will then appear in your sidebar for you to drag and drop to where you want it.
- Click 'Save arrangement' and you're done.
- The second option is to offer email subscriptions from a link rather than a form. Just copy the following link code. Users who click it will be prompted to enter their email address in the form that appears.
- Click on 'Use as a widget in' and select your type of blog. Click on 'Go'. The widget will then appear in your sidebar for you to drag and drop to where you want it.
- Click 'Save arrangement' and you're done.
Do share if anything's unclear or I've missed anything out. Has this helped? I look forward to hearing from you.


