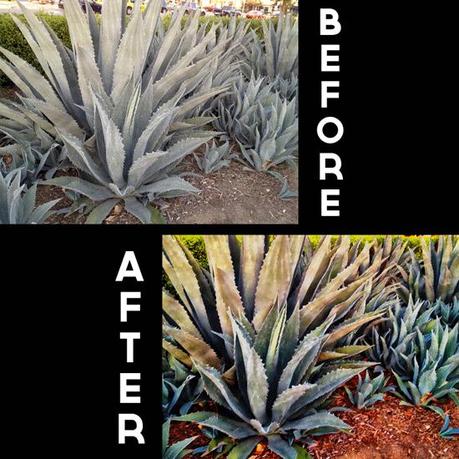
I was happy to be able to give away several copies of iColorama. Now that you have it, what can you do with it?
Here’s a step-by-step tutorial making a rather ordinary photo into something extraordinary using only iColorama.
Here is the before image, shot with an iPhone 4S using the ProCamera app to capture the image.

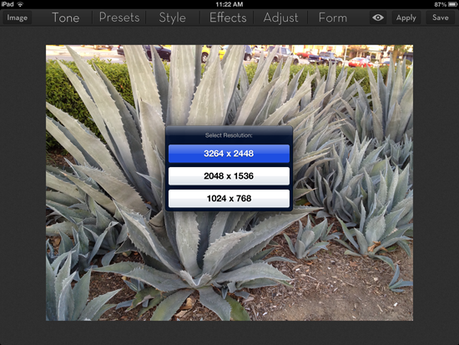
1. Open image in iColorama and select the highest resolution
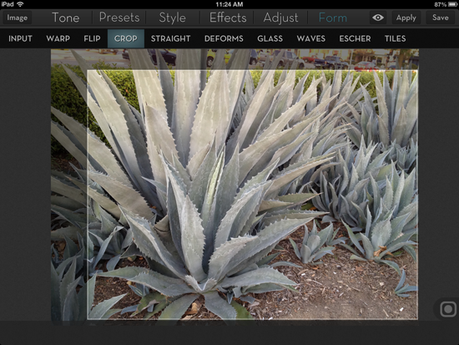
2. Under the FORM tab, select CROP and crop as desired. Click APPLY. You can skip this step if your image does not need cropping.
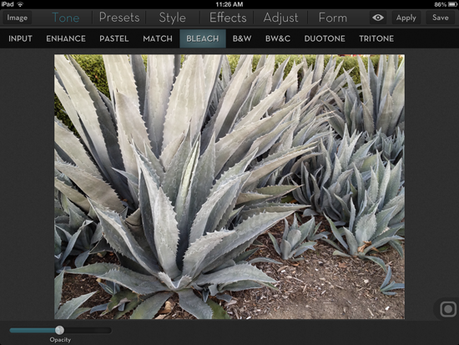
3. Under TONE tab, select BLEACH. Adjust Opacity to 0.50 using slider and APPLY.
4. Under ADJUST tab, select HDR. Select Preset #2. Adjust opacity to 0.35, Brightness to 0.07, Exposure to 0.10 and Bleach to 0.40 and APPLY.
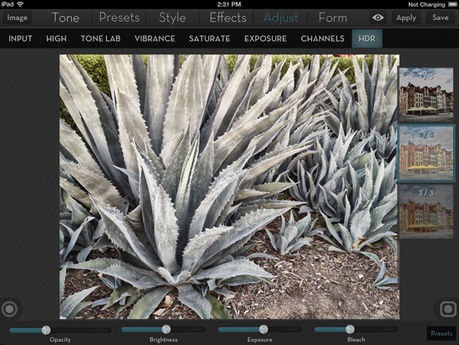
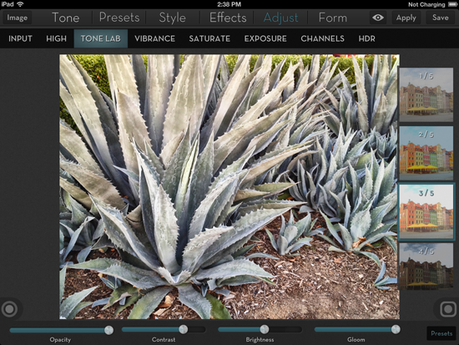
5. Under ADJUST tab, select TONE LAB. Choose Preset #3. Adjust Opacity to 1.0, Contrast to 0.75, Brightness to 0.11 and Gloom to 1.00 and APPLY.
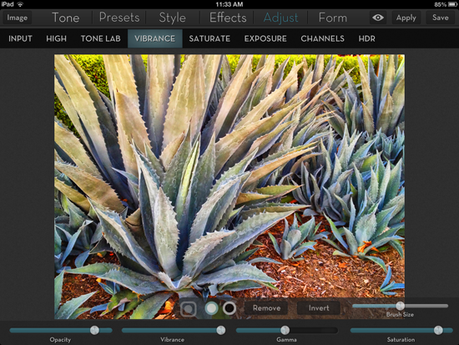
6. Under ADJUST select VIBRANCE. Adjust Opacity to 0.85, Vibrance to 1.00, Gamma to –0.06, Saturation to 0.75 and APPLY.
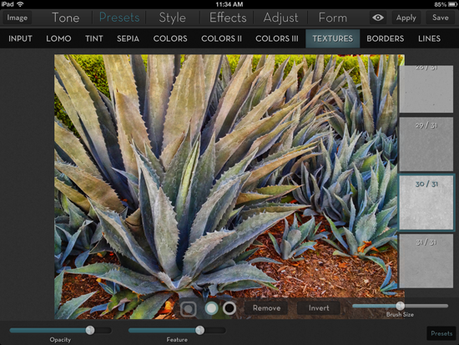
7. Under PRESETS select TEXTURES. Apply Texture #30 and adjust Opacity to 0.8 and Feature to 0.50 and APPLY.
8. Under STYLE select SIMPLIFY. Keep Opacity at 1.0 and adjust Feature to 0.70 and APPLY.
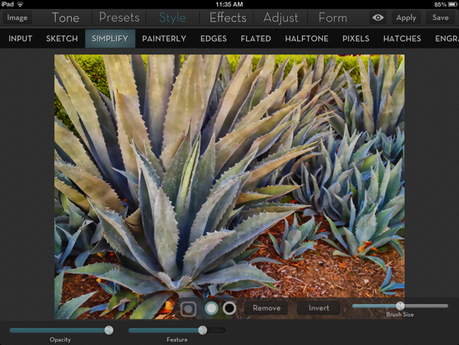
9. Under STYLE select EDGES. Select Preset #2. Adjust Opacity to 1.00 and Feature to 0.25 and APPLY.
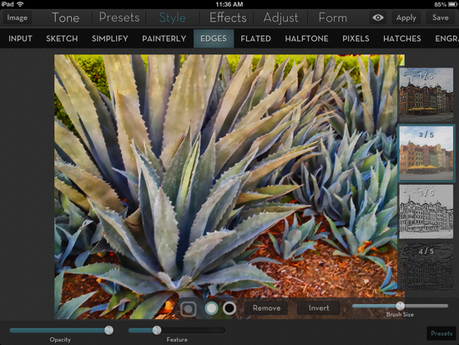
10. Under EFFECTS select SHARPEN. Keep Opacity at 1.0 and adjust Feature to 0.10 and APPLY.
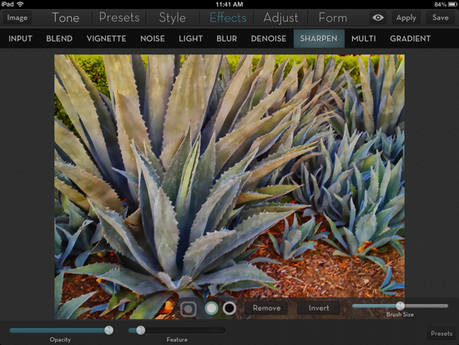
11. Under ADJUST select SATURATION adjust Opacity to 0.50, Brightness to 0.20, Darkest to 0.10 and Gamma to 0.50 and APPLY.
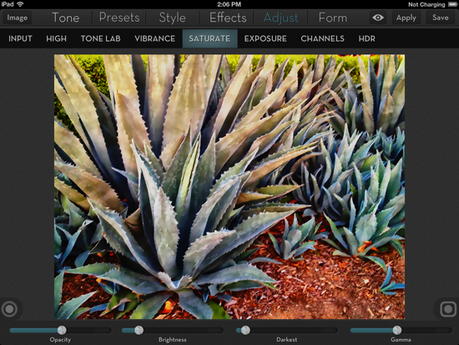
Here is the AFTER image.

There is never one way to edit an image and the best way to find out the capabilities of iColorama is to experiment. Enjoy!
