Today I will try my hand at a first DIY tutorial. Bear with me as I probably may not have all the photography necessary for a DIY. Anyhoo, I will give you the basics for how to make them.
When you stop to think about it, we all have trash that we toss into our blue recycle bins each week. Do you ever find yourself looking at what you put in and think about what it could be used for? That metal can that had your pizza sauce in it is now clean perhaps with the label off can be useful as a cool pencil container. I've done this before with different metal containers or a nice coffee can with a cover.
I like to glue pretty fabric on them and then trim my edges. I use masking tape first on the top, especially if it is a metal can with the sharp edges. And then the fabric covers it. That way you are guaranteed not to cut your fingers.
A glass salsa jar can be a nice little vase. If you look to Pinterest there are all kinds of pins with mason jars painted and then glazed. What I did with mine was to get an elastic, then stick some of those wooden garden sticks all around and it is a cute little vase for the flowers in my garden.
So that is some of the other ideas, and now onto the cereal box notebooks, journals and writing prompt books.
Earlier this spring and summer, I started collecting the cereal boxes from the recycle. You don't have to limit yourself to this. I've been using any cardboard food box that is going to be the size for my notebooks.
You can make almost any type of notebook with the cereal boxes, etc.... You can use it for scrap booking, a notebook, a little notebook for a kid to write or draw in, a collage journal or notebook, a writing prompt book, quotes and sayings, favorite family recipes, kids pictures, an address book or a little book for business cards, a book for your favorite social bookmarking sites, fav. websites, blogs, a writing prompt book, a little notebook for research, poetry, a character list for a novel you are working on, or perhaps your storyline skeleton outline, and practically anything you want to jot down so you will have it at your fingertips.
Here's what you may need:
cereal boxes & other boxes
art paper,
scrapbook paper
magazine pieces and any other pretty pictures of your choice
glue stick
glue of choice
paper trimmer
yarn or ribbon
fabric
photo copied pictures (your family pictures, photography, artwork, etc...)
artwork (you have done and you want to add it)
paints of your choice.
(I like Golden Acrylics) We also have the cheaper Folk Art brand, I have professional watercolor pencils, graphite pencils, pastels, professional colored pencils, etc....
Bic Sharpies - black fine tipped. (I absolutely love these for making my paper dolls and my pen & ink drawings. I think they do just as nice of a job as the professional ones and you get two in a package at the grocery store)
newspaper
lined paper
double sided tape
Good sewing string (if you want to try bookbinding) I won't demonstrate that in this post as I haven't done it in a long time. It's a matter of folding a certain amount of paper at a time and you practice sewing along the seam then you add them all together and sew it more. Maybe I will try this later and do another DIY)
yo yo circles (for putting on the cover)
pretty envelopes
gel pens
markers
lace
beads or sequins (for your cover)
ribbon yarn or pretty metallic yarn
Okay, that's a bunch of ideas. Not that you are going to use all of it, but that maybe can get you inspired.
I start by using my paper trimmer to cut my cereal boxes to the size I want. A good size to work with is:
4 1/2 inches by 7 inches. For a cereal box, you can get about four of them out of it. Before you cut, carefully rip off all the smaller parts of the box. It makes it easier to trim if you don't have that in the way.
Other food boxes you can usually get one or two pages.
Since I started cutting them out, I've gotten quite the pile. You would be surprised that it adds up quick.
It really is so easy to just go out and buy a regular notebook, but it is also fun to make them. It's a form of paper and free. My Grampy used to save the paper that came with women's nylons for their grocery list. I've had smaller pieces too from the cereal boxes and when you aren't near any other paper, it sure comes in handy when you need to jot something down.
I forgot, you are going to need a paper punch.
Today I started paper punching my cereal boxes and then got some yarn and strung it through and tied it in a bow with a knot.
Then, I had some photography photos I had printed of my artwork and other photographs for my cover. Then on the insides I started to do a little bit of collage work with the pieces I had and my paper punch pieces I had punched out last month. And I found some photocopied pictures of my Mom, Nana and Grammy and glued them in. Mine aren't really done, but my pictures will show you the start and the possibilities you could try.
You could choose to use fabric for your cover. For that you might want to glue your fabric to the cardboard and then set it aside until you are done stringing your pages. Of course you won't be able to paper punch those. I think what you could do is to cut a binding out of some cardboard and also cover that in fabric.
So say your binding would probably be: 1 - 2 inches width by 7 inches length. You could cover all your fabric pieces then sew them together.
Or you could choose to have the cover, back and the binding be all one piece. For this, you would need a ruler and an xacto knife and would have to score where you want the binding to be, two times for the front and back. Don't cut all the way through. Then you carefully bend it around the scoring.
Glue your fabric on the way you want. Maybe you want one fabric for the front and another color for the inside.
Or you could use scrap booking paper for it. Or you could paper punch the binding so that you can string the yarn through. The other way would be to glue it, but then you wouldn't be able to easily flip the pages.
For your pages, you can choose which ones you want in it. Maybe you want some pretty scrapbook pages the same size, or some art paper so you can draw in it too.
You could use the paints, markers, pencils, etc... for drawing or painting on all the pages. You could use some sponges for a speckled effect. They have special combs for other effects. I have some somewhere and should find them. They are made of black rubber.
Marbleized paper is pretty too. That could be another DIY.
You could even use newspaper if you want, paint on it, glue some blank white paper to the newspaper pages and then use the paper punch. Any found object that would be useful for this think about if it would work in your project.
The yo yo circles are easy to make too if you want to glue a few on your cover. Cut out a piece of fabric from a french onion dip cover or something. Then cut your other pieces from the template. Sew around the edge of circle with 1/4 inch of the right side on the wrong, then gather and pull and sew in a knot to hold it together.
Pick out the yarn of your choice to thread through your pages. Or the ribbon or the ribbon yarn.
Once you have your notebook or journal beginnings, you are ready to start creating, gluing, cutting out and also writing down whatever you want to write about.
And you could also glue or sew the sequins or beads on. They could look cute on the binding.
Good luck and have fun.
Jennifer Jo Fay
Copyrighted August 30, 2012
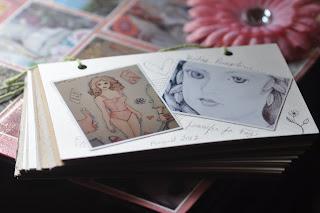
Here's my first cereal box notebook, just the beginnings.
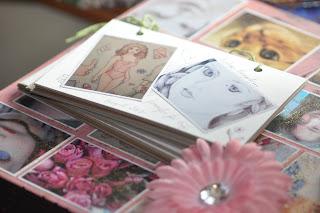
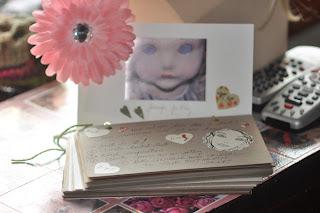
Some paper punch pieces I glued in. Along with some notes and quotes I wrote. And I had paper punched a few of my older drawings. I've used my art paper for the cover and the back, but you could also choose to scatter them on the inside pages too. Maybe I'll do that for my next one.
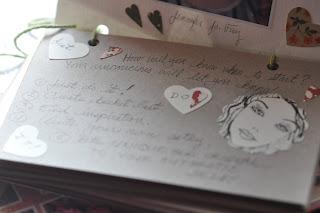
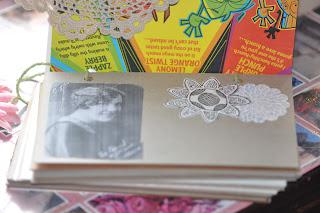
This one is a few pieces of my drawings and also my Grammy. Below is my mom in the bigger picture and the little heart picture paper punch is my Nana. I had gone to UPS years ago and had these black and white photo copies.
I am thinking you would want to do something to the backs of the cereal boxes so that you don't see the print. I am either going to paint over it so it is covered and/or glue scrapbook pages and pieces to it to cover it. I'm also thinking when all my pages are done, I might want to modge podge each page so it is a permanent fix. I haven't decided on that. I'm also wondering if I do that, would the pages stick?
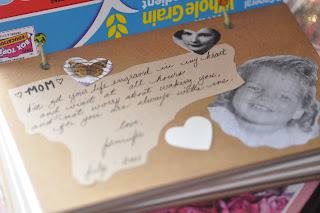
This one was a short poem I had written shortly after my mom passed away. And I turned it into a collage piece. The butterfly stamp I paper punched.
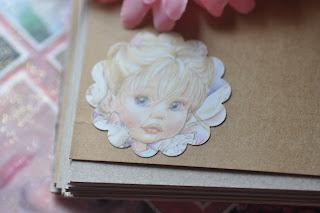
This piece was from a notecard. You could also choose to print up DIY's or anything from the web that you want to glue in the pages for reference.

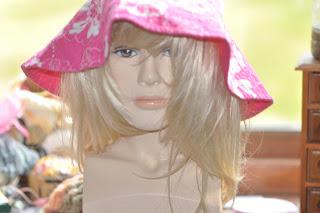
My mannequin with a new hat. Not sure if I'm listing it on Ebay yet.
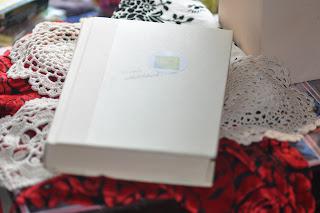 This one is another DIY idea. I got this old book at a yard sale a while ago and started to draw on one of the inside pages and write some words on it just to see what it looked like over the typed words. Then I got taping in large index cards and writing notes, writing prompts, some of my favorite little knitting patterns for the headbands or anything. I bet they could be used for scrapbooking too and you could glue some fabric on the cover or scrap booking and then modge podge.
I've also tried to glue all the sides together to make a box. The real tricky part about that is you have to use your xacto knife and it's hard to get it perfect. So I think I'm going to cross that one off the bucket list and not end up doing it.
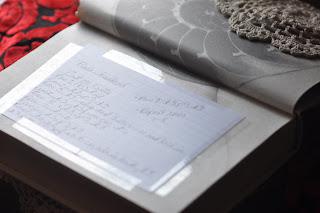
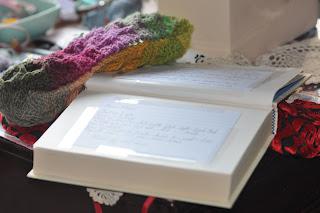
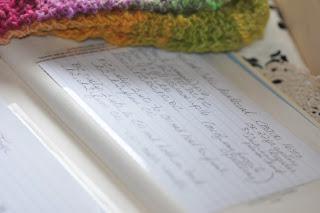
One of the knitting patterns for my honey comb cabled pattern for the headbands.
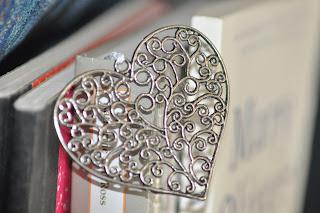
This metal heart I had purchased when I got a lot of my beads and charms for the beaded bracelets. It was bigger than I imagined so yesterday I grabbed a ribbon I was going to throw out and I tied it to the heart and now it's my book mark.
I should make a few more of the beaded bracelets soon too. Those are also fun to make.
I'll have more pictures of these in the future as I progress into the scrapbook designing. This is still a very small start and really not how I want to design my whole scrapbook pages to sell.
I think for those pages I am going to have them be standard size 8 1/2 " x 10 roughly. That way, I will have a larger work space, but these smaller pages could be some beginnings for that. And pages I really like I will photograph and use for the larger pages.
And the software programs will be great for that.
Adobe Elements 7 (the newest Photoshop might be my Christmas treat or the previous version of it)
Mystical
Photopro Green Key
Corel Draw
Paint it
etc.....
