Growing up, my grandparents grew every kind of vegetable imaginable in their garden. My grandmother "put up" veggies in every way I could have imagined. She knew how to preserve anything. They would also get various kinds of berries from the woods or neighbors and my grandmother would makes jams and jellies out of them. My most treasured summers as a child were spent with them on the farm. Though I now realize how much work it was, back then it was fun to help them hoe weeds, gather the vegetables and help my grandmother can them.
When I became an adult, I realized that my grandmother would someday no longer be with me. (Thankfully, she still is. She is nearly 96 years old as I write this.) I sat down with her one summer and asked her to teach me and show me how to can my favorites. I made a notebook full of her recipes and instructions for canning and preserving my own jam and vegetables.
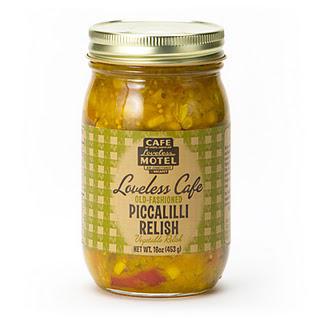
Here is one of my favorites (tho not a photo of my grandma's version)...My grandma always called it Picadilly. I like to call it Pickle-ish. Enjoy!

1 gallon each of cucumbers, green peppers (you can make it colorful with a variety of peppers) & onions
1 C apple cider vinegar
3 C sugar & any additional to suit your own taste
1 Tbsp. canning salt (yes this is different from table salt)
1 tsp. tumeric
1 Tbsp. mustard seed
1 Tbsp. celery seed
Slice cucumbers; removing seeds if necessary.
Cut peppers & onions into small strips.
Combine remaining ingredients in a large saucepan over medium heat.
Stir until sugar is dissolved.
Add cucumbers, peppers & onions.
Cook until it comes to a boil.
Cook for 15 minutes from this point.
Pour into jars and "hot seal" each jar before filling the next.
If you are not familiar with hot sealing or have never canned before, this is what you do:
Put clean canning lids in cold tap water in a saucepan. Heat to boiling. When water starts to bubble around the edges, turn fire down to low heat. leaving lids in the hot water.
You will need to work quickly but gently from this point on...
Fill one canning jar with desired food; generally to neck of the jar.
Wipe rim of jar with a clean cloth or paper towel to insure proper sealing.
Remove one lid from the hot water. Dry it off with a clean cloth or paper towel.
Place lid on jar.
While holding lid on securely, put clean, dry canning jar rim on and tighten down as much as possible by hand.
Gently place jar in an area where it can remain undisturbed until it seals itself.
Many times you will hear the jars "pop" as they seal.
Another way to make sure that jar has sealed, is to check the dome of the lid. When it has properly sealed, it will be slightly concave.
NEVER keep food for any length of time that has not properly sealed. Always use it immediately or dispose of it.
NEVER reuse canning lids. Rims, however, may be reused many times as long as they remain rust free.
