To celebrate Valentine’s Day I decided to make cake pops for my son to take to school. After a little trial and error they turned out awesome. I took a few pictures of the process, I’ll post those and the recipe below. Hope everyone had a great V-Day!

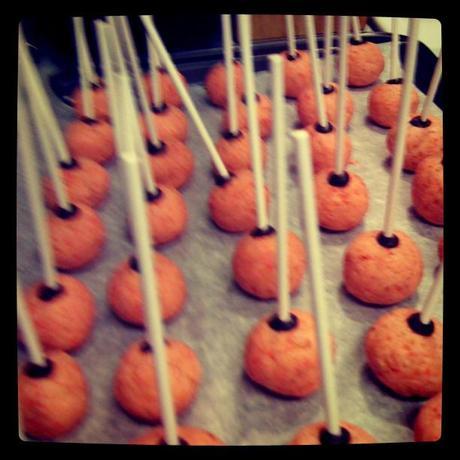
This picture is after I have all the lollipop sticks in. I’ve made these where you stick the stick in as you go but I’ve had more success with putting all of the sticks in and then sticking the tray back in the fridge for a few minutes to let them set up.

And these are the finished product all packaged and ready to be taken to school.
Print Valentine Cake PopsRating: 51
Yield: 40-50
Serving Size: 1 Cake Pop
Ingredients
- Cake Mix (any will do)
- 1 Can of Icing (you'll only use about 1/2-3/4 of the can)
- **Ingredients listed on your cake mix**
- Lollipop sticks
- Candy Coating (any color)
- Sprinkles or Candy for decorating
- Wax Paper
- Rectangular Piece of Styrofoam (available at most craft stores, or Walmart)
- ***Optional***
- Treat Bags
- Ribbon
Instructions
- Make the cake mix as directed.
- Allow the cake to completely cool. I usually stick mine in the freezer for 10-15 minutes, long enough to not freeze the cake but completely cool the cake.
- Once the cake is cooled you'll want to cut it into 4 sections and rub 2 sections together at a time to crumble the cake in a large bowl. There should be no large clumps.
- Mix in 1/2 the can of icing. If needed add a little more, but you should not need to use the whole can.
- Put the mixture in the refrigerator about 10-15 minutes to let it get nice and set up.
- Put a sheet of wax paper over a cookie sheet.
- Once the mixture is a set up start forming the cake balls. You can use a cookie scoop or just hand form them. They should be about the size of a quarter. You can get between 40-50 from just one cake mix.
- Place the cake balls on the wax paper, once your done either refrigerate over night or stick them in the freezer for 10-15 minutes to let them set up.
- Once they are set up (no longer sticky to touch) give them a quick hand roll to make sure they are all smooth and place back in the refriderator.
- Follow the directions on the candy coating to melt it. Make sure your bowl is deep enough to dip the cake pops in.
- Once the coating is melted and slightly cooled (it should not be hot hot, just slightly warm), take out the cake balls and grab your lollipop sticks.
- Stick the tip of the sticks in the candy coating and tap off the excess. Insert into the cake balls. No more than half way in, and you'll be able to see a little of the coating on the outside of the cake balls. Place downward on the wax paper. Finish this with all of the cake balls.
- Place in the freezer for about 3 minutes, or refrigerate for around 5 minutes. This is to get the candy coating good and set up.
- While that is setting up make sure you have enough candy coating melted, I usually use 12 oz. at a time. And make sure you have your sprinkles or decorating supplies all set up. You'll want a bowl or plate probably to catch any extra sprinkles.
- Now its the fun part! It's time to decorate your cake pops! Grab your cake pops out of the freezer and let's get started. This works best then they are cold so if during the process they seem like they are starting to come apart just put them back in the fridge or freezer to get them firm again. Also you can reheat the candy coating 30 seconds at a time and it will work really well. Just make sure to not get ANY water or any other liquid in the candy coating.
- Dip the cake pop in the candy coating and use a spoon if needed to get it completely covered. While holding it in your right hand over the bowl slightly tap your hand with your left hand to get any excess coating off.
- Wait for about 30 seconds and then add your toppings!
- When done decorating set the cake pops in the Styrofoam to finish drying.
- Once you've finished place all the cake pops in the fridge for about and hour. This makes sure they are nice and set up.
- You can certainly stop here but if your going to be transporting these I've found the best way is to cover them with treat bags and then tie a little ribbon around to close it. These transport very well, you can lay them down in a sack and they should be just fine.

