Are you new to Photoshop or does Photoshop frighten you? C'mon, you can tell me. It frightened me terribly when I first opened it so trust me when I say I understand completely! Can I tell you a little secret though? It’s not as scary as it looks. That’s right. In fact, with a little workspace organization, you will be up and running in no time! Promise!
ORGANIZING your WORKSPACE with TOOLBARS
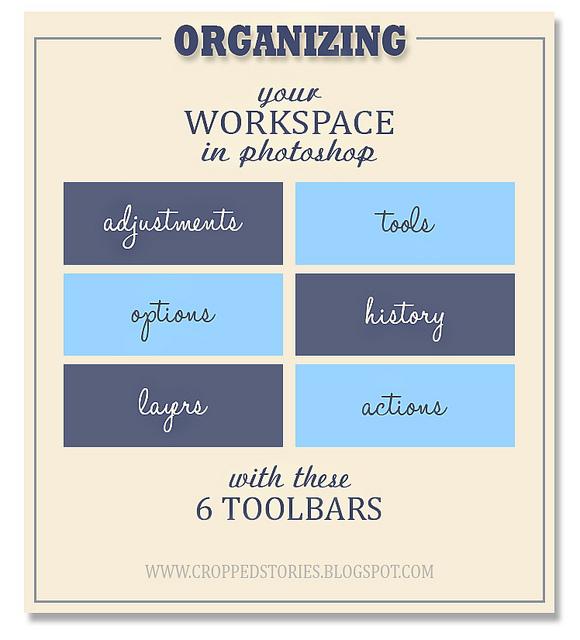
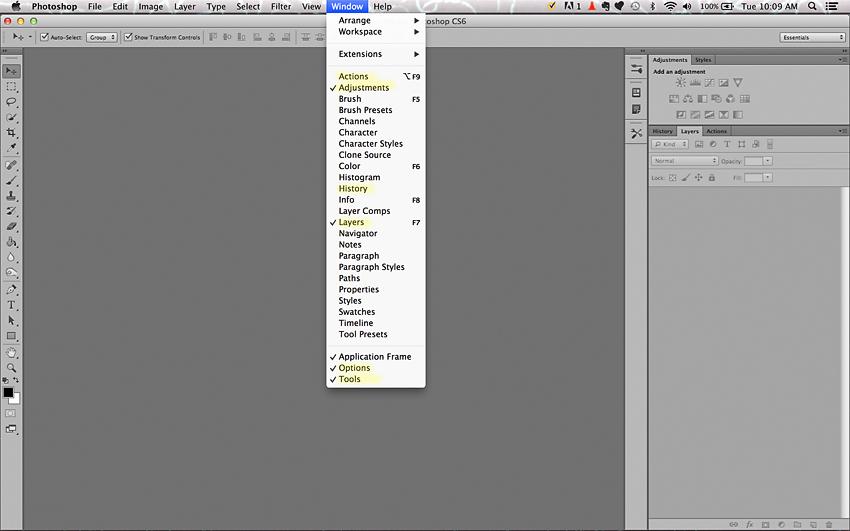
One of the first things my sister, a Professional Photographer, helped me set up was my workspace. Not hip to the lingo? No worries! Either was I at first. The workspace is the first thing you see when you open the program. You may notice some toolbars on the right and left of your workspace and a menu at the top of your screen. Your toolbars, like any other program, can be customized to fit your personal editing style. I know it may be tempting to jump right in and try to start editing, but I recommend organizing your workspace with toolbars first! Not sure which tools you'll need? No problem! That's what I'm here for. Toolbars you're apt to use repeatedly for basic adjustments to your photos will be the ADJUSTMENTS toolbar and TOOLS. In case these are not already visible on your workspace, go to your menu at the top of your screen and look for Window. Choose Adjustments and Tools.
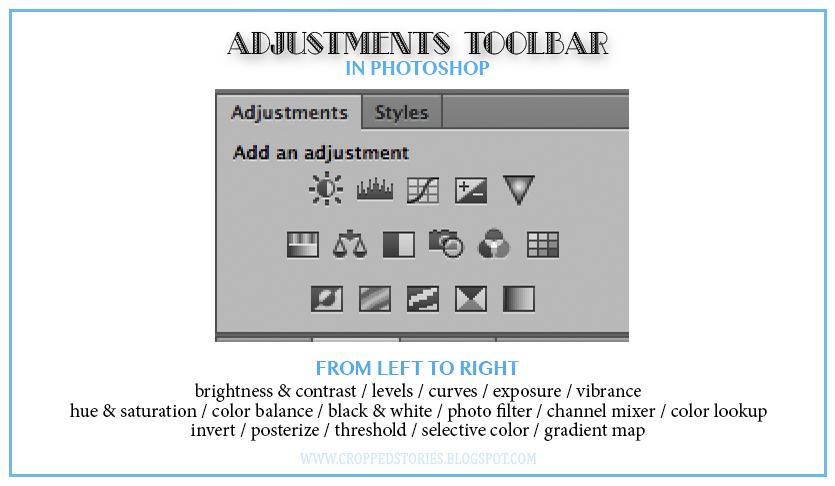
ADJUSTMENTS:
The adjustments toolbar consists of sixteen toolbars in one! Tools I use on almost all my images are: color balance, exposure, and brightness/contrast. Other more frequently used tools are: hue/saturation, curves, levels, and vibrance.
TOOLS:
This is a vertical toolbar that usually shows up to the left of your workspace. Tools in this toolbar that are more commonly used are the:
- Selection tools (path and direct selection)
- crop tool
- Spot Healing Brush, healing brush, and patch tool: Great for removing spots, blemishes, dirt, lines, hairs, lint, etc.
- Brush tool: Commonly used with layer masks and actions.
- Clone Stamp tool: Excellent for extending or evening out backgrounds that may consist of mulch, grass, pavement, flowers, trees, etc.
- Dodge tool: Perfect for brightening eye whites and irises, shadows, creating highlights on faces, evening out skin tones etc.
- Burn tool: Great for creating vignettes, darkening the outline around the eye, pupils, lash line, filling in eye brows, etc.
- Eye Dropper tool: Allows you to choose color from anywhere on your image.
- Color Picker tool: Allows you to choose color for brushes, text, shapes, etc.
To see these tools in use, feel free to check out some of my Photoshop Video Tutorials!

Additional goodies to keep at your fingertips are the History, Layers, and Options toolbars. Let me break these down for you.
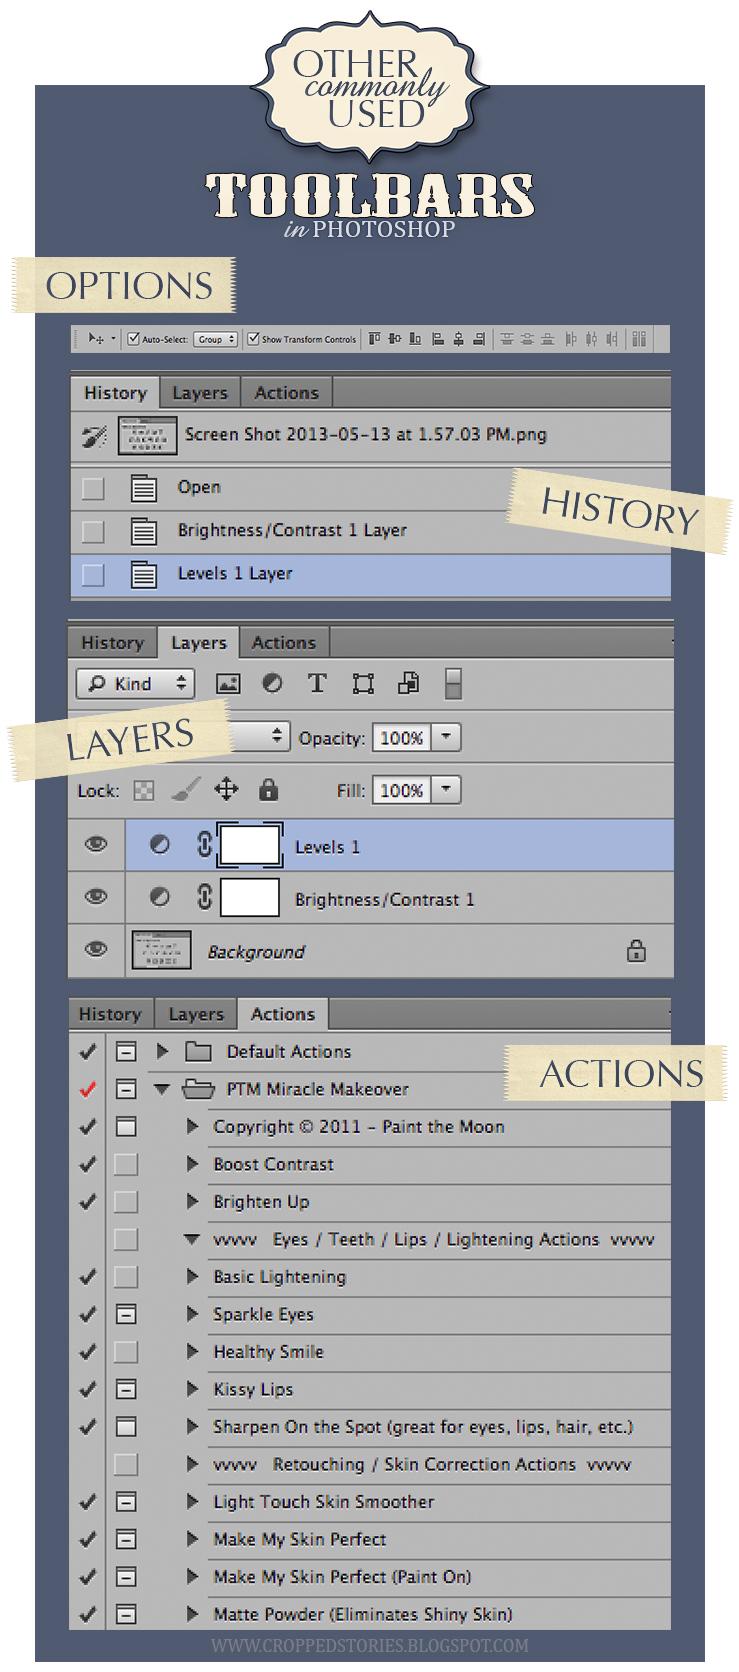
OPTIONS TOOLBAR:
Allows you to view additional options for the tool you are currently using.
HISTORY TOOLBAR (also known as the undo button):
Important for reverting back to a previous step if you don't like your most current change. I use my history toolbar all the time!
LAYERS TOOLBAR:
Allows you to view, edit, turn off, delete, merge, flatten, and/or duplicate a layer(s).
Lastly, you may want to display your Actions toolbar assuming you have actions.
ACTIONS:
A recording of steps/commands taken to achieve an end result/look for an image. For example: you may adjust the color balance, contrast, and exposure of an image. Once you've recorded those steps and given it a name (for example, Clean Edit) all you'd have to do is click on a button to play the action to apply the same three adjustments to a different image! What a time saver right? Many websites sell actions and bundles for reasonable prices. Looking for some great actions? Feel free to check out some of the websites below!
- Paint the Moon
- Florabella Collection
- mcp actions
- {M4H} Photography
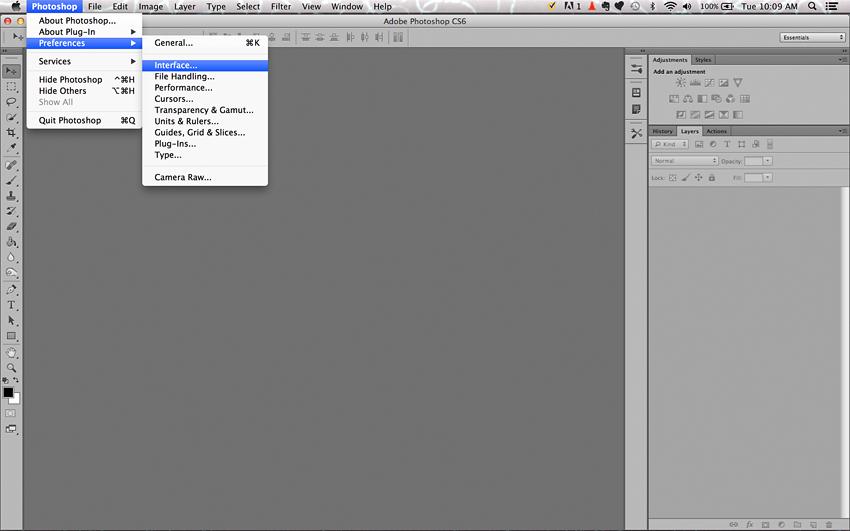
Other customizations you can make to your workspace are color theme and border changes. Just go to Photoshop / Preferences / Interface.
Okay, now that your workspace is organized, get ready to have some fun!
Lastly, and most importantly, open an image already and start using some tools! It's the best way to familiarize yourself with the program! I'm confident that, in no time, Photoshop will be a walk in the park for you!
If you missed my previous post Spot the Differences (a game for Friday), feel free to check it out and play if you're up for the challenge! Don't forget to leave me a comment to let me know how many differences you find (that's my favorite part)!
Also, if you haven't taken my poll displayed at the top of my page in my sidebar to the right, I hope you'll take a look! Your vote would be greatly appreciated!

