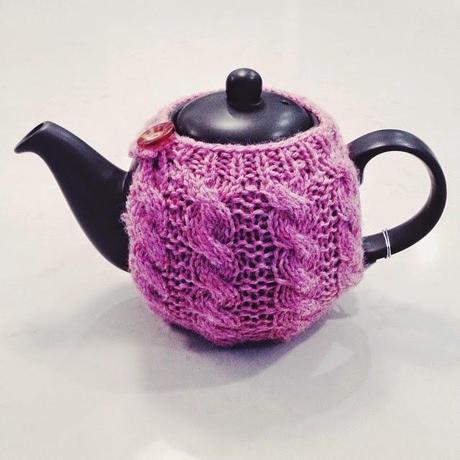
Materials:
- one ball of Lion Brand Wool Ease yarn in Rose Heather
- size 8 (5mm) needles
- cable needle
- button
- tapestry needle
- 1.4L teapot
Legend:
K = Knit
P = Purl
m1 = make one
C6 = move 3 stitches onto cable needle, keep in front, knit the next 3 stitches, and then knit the stitches from the cable needle
P2t = purl two together
Instructions:
Cast on 20 stitchesRows 1-4: rib in K1, P1 pattern
Row 5: *P2, M1, P1, M1* repeat to end
You should now have 32 stitches
Next you're going to be making the cables, each big cable takes 6 rows to complete an entire "cable" so if you want to make your tea cosy longer, keep in mind these 6 rows
Row 6: *P2, K6* repeat to end
Row 7: Purl
Row 8: *P2, K6* repeat to end
Row 9: Purl
Row 10: *P2, C6* (see cable legend above)
Row 11: Purl
Now you've completed one cable! Good job.
Repeat rows 6-11 4 more times (or more if you need it to be longer)
You should have completed 35 rows
Row 36: *P2t, P1* repeat to end
You should now have 20 stitches
Row 37-40: *K1, P1* repeat to end
Cast off
For the second side of the tea cosy you'll have to add an extra place to put the button, you can use your own method or follow what I did below:
Row 37: Cast on 4 stitches, and work in K1, P1 ribbing
Row 38: *K1, P1* repeat until last 4 stitches - cast off two stitches then K1, P1
Row 39: K1, P1, make two and continue in K1, P1 ribbing until end
Row 40: *K1, P1* repeat until end
Cast off
To assemble attach the bottoms with your tapestry needle, and add the button to the top. Put it on your teapot and admire your work!
xx
